将 Microsoft Graph 连接器作为 Windows 服务托管
本文介绍如何将 Microsoft Graph 连接器作为 Windows 服务进行托管,使其持续运行。
连接器可执行文件必须始终运行,以便连接器平台可以在爬网期间向它发出请求或执行任何连接管理操作。 可执行文件不会主动消耗任何资源,但连接器被爬网的时间除外。 其余时间,连接器可执行文件将处于空闲状态。
使连接器可执行文件持续运行的一种方法是将其作为 Windows 服务进行托管。 如果可执行文件注册为 Windows 服务,操作系统将负责启动进程,并在系统崩溃时重启它。
使用以下步骤将连接器作为 Windows 服务进行托管:
右键单击包含自定义连接器项目的解决方案,然后选择“ 添加新>项目”。
搜索辅助角色服务模板,将其选中,然后选择“下一步”。
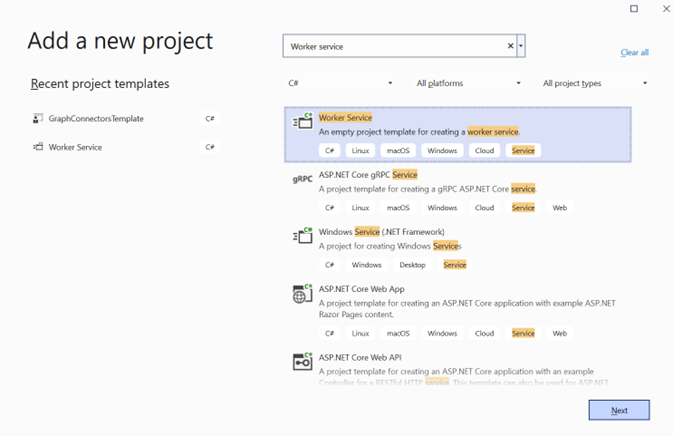
将项目命名 为 CustomConnectorWorkerService ,然后选择“ 下一步”。
选择 “.NET Core 3.1 ”作为目标框架,然后选择“ 创建”。
右键单击辅助角色服务项目,然后选择“ 在终端中打开”。
在终端中运行以下命令。
dotnet add package Microsoft.Extensions.Hosting --version 6.0.0
dotnet add package Microsoft.Extensions.Hosting.WindowsServices --version 6.0.0
右键单击辅助角色服务项目,然后选择“ 添加>项目引用”。
选择 “CustomConnector ”项目,然后选择“ 确定”。

将 Worker.cs 文件中的代码替换为以下代码。
using CustomConnector.Server;

using Microsoft.Extensions.Hosting;
using Microsoft.Extensions.Logging;

using System.Threading;
using System.Threading.Tasks;

namespace CustomConnectorWorkerService
{
    public class Worker : BackgroundService
    {
        public Worker(ILogger<Worker> logger)
        {
            var server = new ConnectorServer();
            server.StartLogger();
            server.Start();
        }

        protected override async Task ExecuteAsync(CancellationToken stoppingToken)
        {
            while (!stoppingToken.IsCancellationRequested)
            {
                await Task.Delay(1000);
            }
        }
    }
}
将 Program.cs 文件中的代码替换为以下代码。
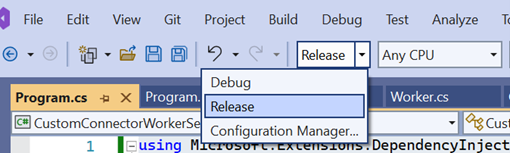
using Microsoft.Extensions.DependencyInjection;
using Microsoft.Extensions.Hosting;

namespace CustomConnectorWorkerService
{
    public class Program
    {
        public static void Main(string[] args)
        {
            CreateHostBuilder(args).Build().Run();
        }

        public static IHostBuilder CreateHostBuilder(string[] args) =>
            Host.CreateDefaultBuilder(args)
            .UseWindowsService()
                .ConfigureServices((hostContext, services) =>
                {
                    services.AddHostedService<Worker>();
                });
    }
}
选择 “发布 ”配置并生成 CustomConnectorWorkerService 项目。
运行以下脚本,将自定义连接器注册并启动为 Windows 服务。
$ServiceName = "CustomConnector"
$ExePath = "<Full path of CustomConnectorWorkerService.exe from above build>"
# Create a service with the given executable. This just creates an entry for this service.
sc.exe create $ServiceName binPath="$ExePath" start="delayed-auto"
# Set the service to run under a virtual account NT Service\<ServiceName>. Optionally skip this step to run the service under LOCAL SYSTEM account
sc.exe config $ServiceName obj="NT Service\$ServiceName"
# Restarts service after 5 minutes on first, second and third failures and resets error after 1 day
sc.exe failureflag $ServiceName 1
sc.exe failure $ServiceName reset= 86400 actions= restart/300000/restart/300000/restart/300000
sc.exe start $ServiceName
注意
- 对于每个唯一连接器,服务名称必须是唯一的。
- 有关服务用户帐户的详细信息,请参阅 服务用户帐户。
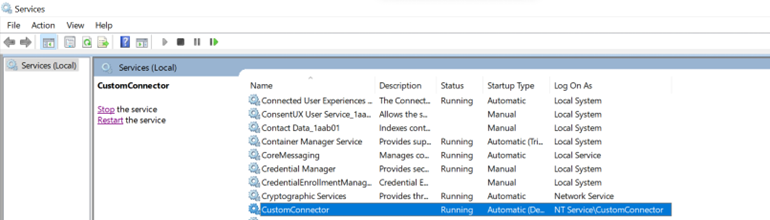
打开 services.msc 并验证服务是否正在运行。
有关托管连接器的任何问题,请参阅 排查错误。